Getting Started
Note
This document assumes you have a working Ansible installation. If you don’t, install Ansible before continuing. This can be done simply by running pip install -r requirements.txt from the root of the project.
It also assumes you have a working Terraform installation. You can download Terraform from Terraform downloads.
General Information about Mantl with Ansible
The Mantl project uses Ansible to bring up nodes and clusters. This generally means that you need three things:
- Hosts to use as the base for your cluster
- An inventory file with the hosts you want to be modified. Mantl includes an Ansible inventory for terraformed hosts, terraform.py.
- A playbook matching Ansible roles to hosts. Mantl organizes its components in sample.yml, which we recommend copying to mantl.yml for the possibility of later customization. You can read more about playbooks in the Ansible docs.
Preparing to provision Cloud Hosts
The playbooks and roles in this project will work on whatever provider (or bare metal) you care to spin up, as long as it can run CentOS 7 or equivalent.
Your hosts will have to be accessible with your SSH key. If you’re unfamiliar with SSH keys, please read DigitalOcean’s guide to setting up SSH keys.
Here are some guides specific to each of the platforms that Mantl supports:
Community-supported platform: .. toctree:
:maxdepth:1

 vsphere.rst
 softplayer.rst
 bare-metal.rst
There are several preparatory steps to provisioning the cloud hosts that are common to all providers:
Step 1: Copy .tf file
You will need to copy the .tf file of the platform you are using from mantl/terraform/ to the root of the project. For example, mantl/terraform/openstack-modules.sample.tf will need to be copied to mantl/openstack-module-sample.tf. The variables in the copied .tf file will need to be changed to your configuration.
Note
More than one .tf file in the mantl directory will lead to errors upon deployment. Since Mantl initially does not support multiple datacenters, extra .tf files will need to be renamed or moved. If you would like to add multiple datacenters see the Consul docs for more information.
Step 2: Run security-setup
Running the security-setup script in the root directory will set up passwords, authentication, and certificates. For more information, see the security-setup script documentation.
Deploying software via Ansible
Note
Ansible requres a Python 2 binary. If yours is not at /usr/bin/python, please view the Ansible FAQ. You can add an extra variable to the following commands, e.g. ansible -e ansible_python_interpreter=/path/to/python2.
The following steps assume that you have provisioned your cloud host by taking the steps listed in one of the guides above.
This project ships with a dynamic inventory file to read Terraform .tfstate files, terraform.py. If you are not running Ansible from the root directory or would like to use a custom inventory file, you can use the -i argument of ansible or ansible-playbook to specify the inventory file path.
ansible-playbook -i path/to/inventory -e @security.yml mantl.yml
Step 1: Add password to the ssh-agent
For the next steps, you may want to add your password to the ssh-agent avoid re-entering your password.
Step 2: Ping the servers to ensure they are reachable via ssh
ansible all -m ping
It may take a few minutes after running terraform for the servers to be reachable. If any servers fail to connect, you can check your connection by adding -vvvv for verbose SSH debugging to view the errors in more detail.
Step 3: Upgrade packages
Warning
Due to updated packages in the recent CentOS 7 (1511) release, it is critical that you upgrade operating system packages on all servers before proceeding with the deployment:
ansible-playbook playbooks/upgrade-packages.yml
If you neglect to upgrade packages, you will likely experience multiple failures, particularly around Consul. See issues 907 and 927 for more details.
Step 4: Deploy the software
First, you will need to customize a playbook. A sample can be found at sample.yml in the root directory which you can copy to mantl.yml. You can find more about customizing this at playbooks. You’ll want to change consul_acl_datacenter to your preferred ACL datacenter. If you only have one datacenter, you can remove this variable.
Next, assuming you’ve placed the filled-out template at mantl.yml:
ansible-playbook -e @security.yml mantl.yml
The deployment will probably take a while as all tasks are completed.
Checking your deployment
Once your deployment has completed, you will be able to access the Mantl UI in your browser by connecting to one of the control nodes.
If you need the IP address of your nodes, you can use terraform.py:
$ python2 plugins/inventory/terraform.py --hostfile
## begin hosts generated by terraform.py ##
xxx.xxx.xxx.xxx         mantl-control-01
xxx.xxx.xxx.xxx         mantl-control-02
xxx.xxx.xxx.xxx         mantl-control-03
xxx.xxx.xxx.xxx         mantl-edge-01
xxx.xxx.xxx.xxx         mantl-edge-02
xxx.xxx.xxx.xxx         mantl-kubeworker-001
xxx.xxx.xxx.xxx         mantl-kubeworker-002
xxx.xxx.xxx.xxx         mantl-kubeworker-003
xxx.xxx.xxx.xxx         mantl-worker-001
xxx.xxx.xxx.xxx         mantl-worker-002
xxx.xxx.xxx.xxx         mantl-worker-003
xxx.xxx.xxx.xxx         mantl-worker-004
xxx.xxx.xxx.xxx         mantl-worker-005
## end hosts generated by terraform.py ##
When you enter a control node’s IP address into your browser, you’ll likely get prompted about invalid security certificates (if you have SSL/TLS turned on). Follow your browser’s instructions on how to access a site without valid certs. Then, you will be presented with a basic access authentication prompt. The username and password for this are the ones generated by security-setup, and are stored in security.yml if you forgot them.
Here is what you should be looking at after you connect and authenticate:
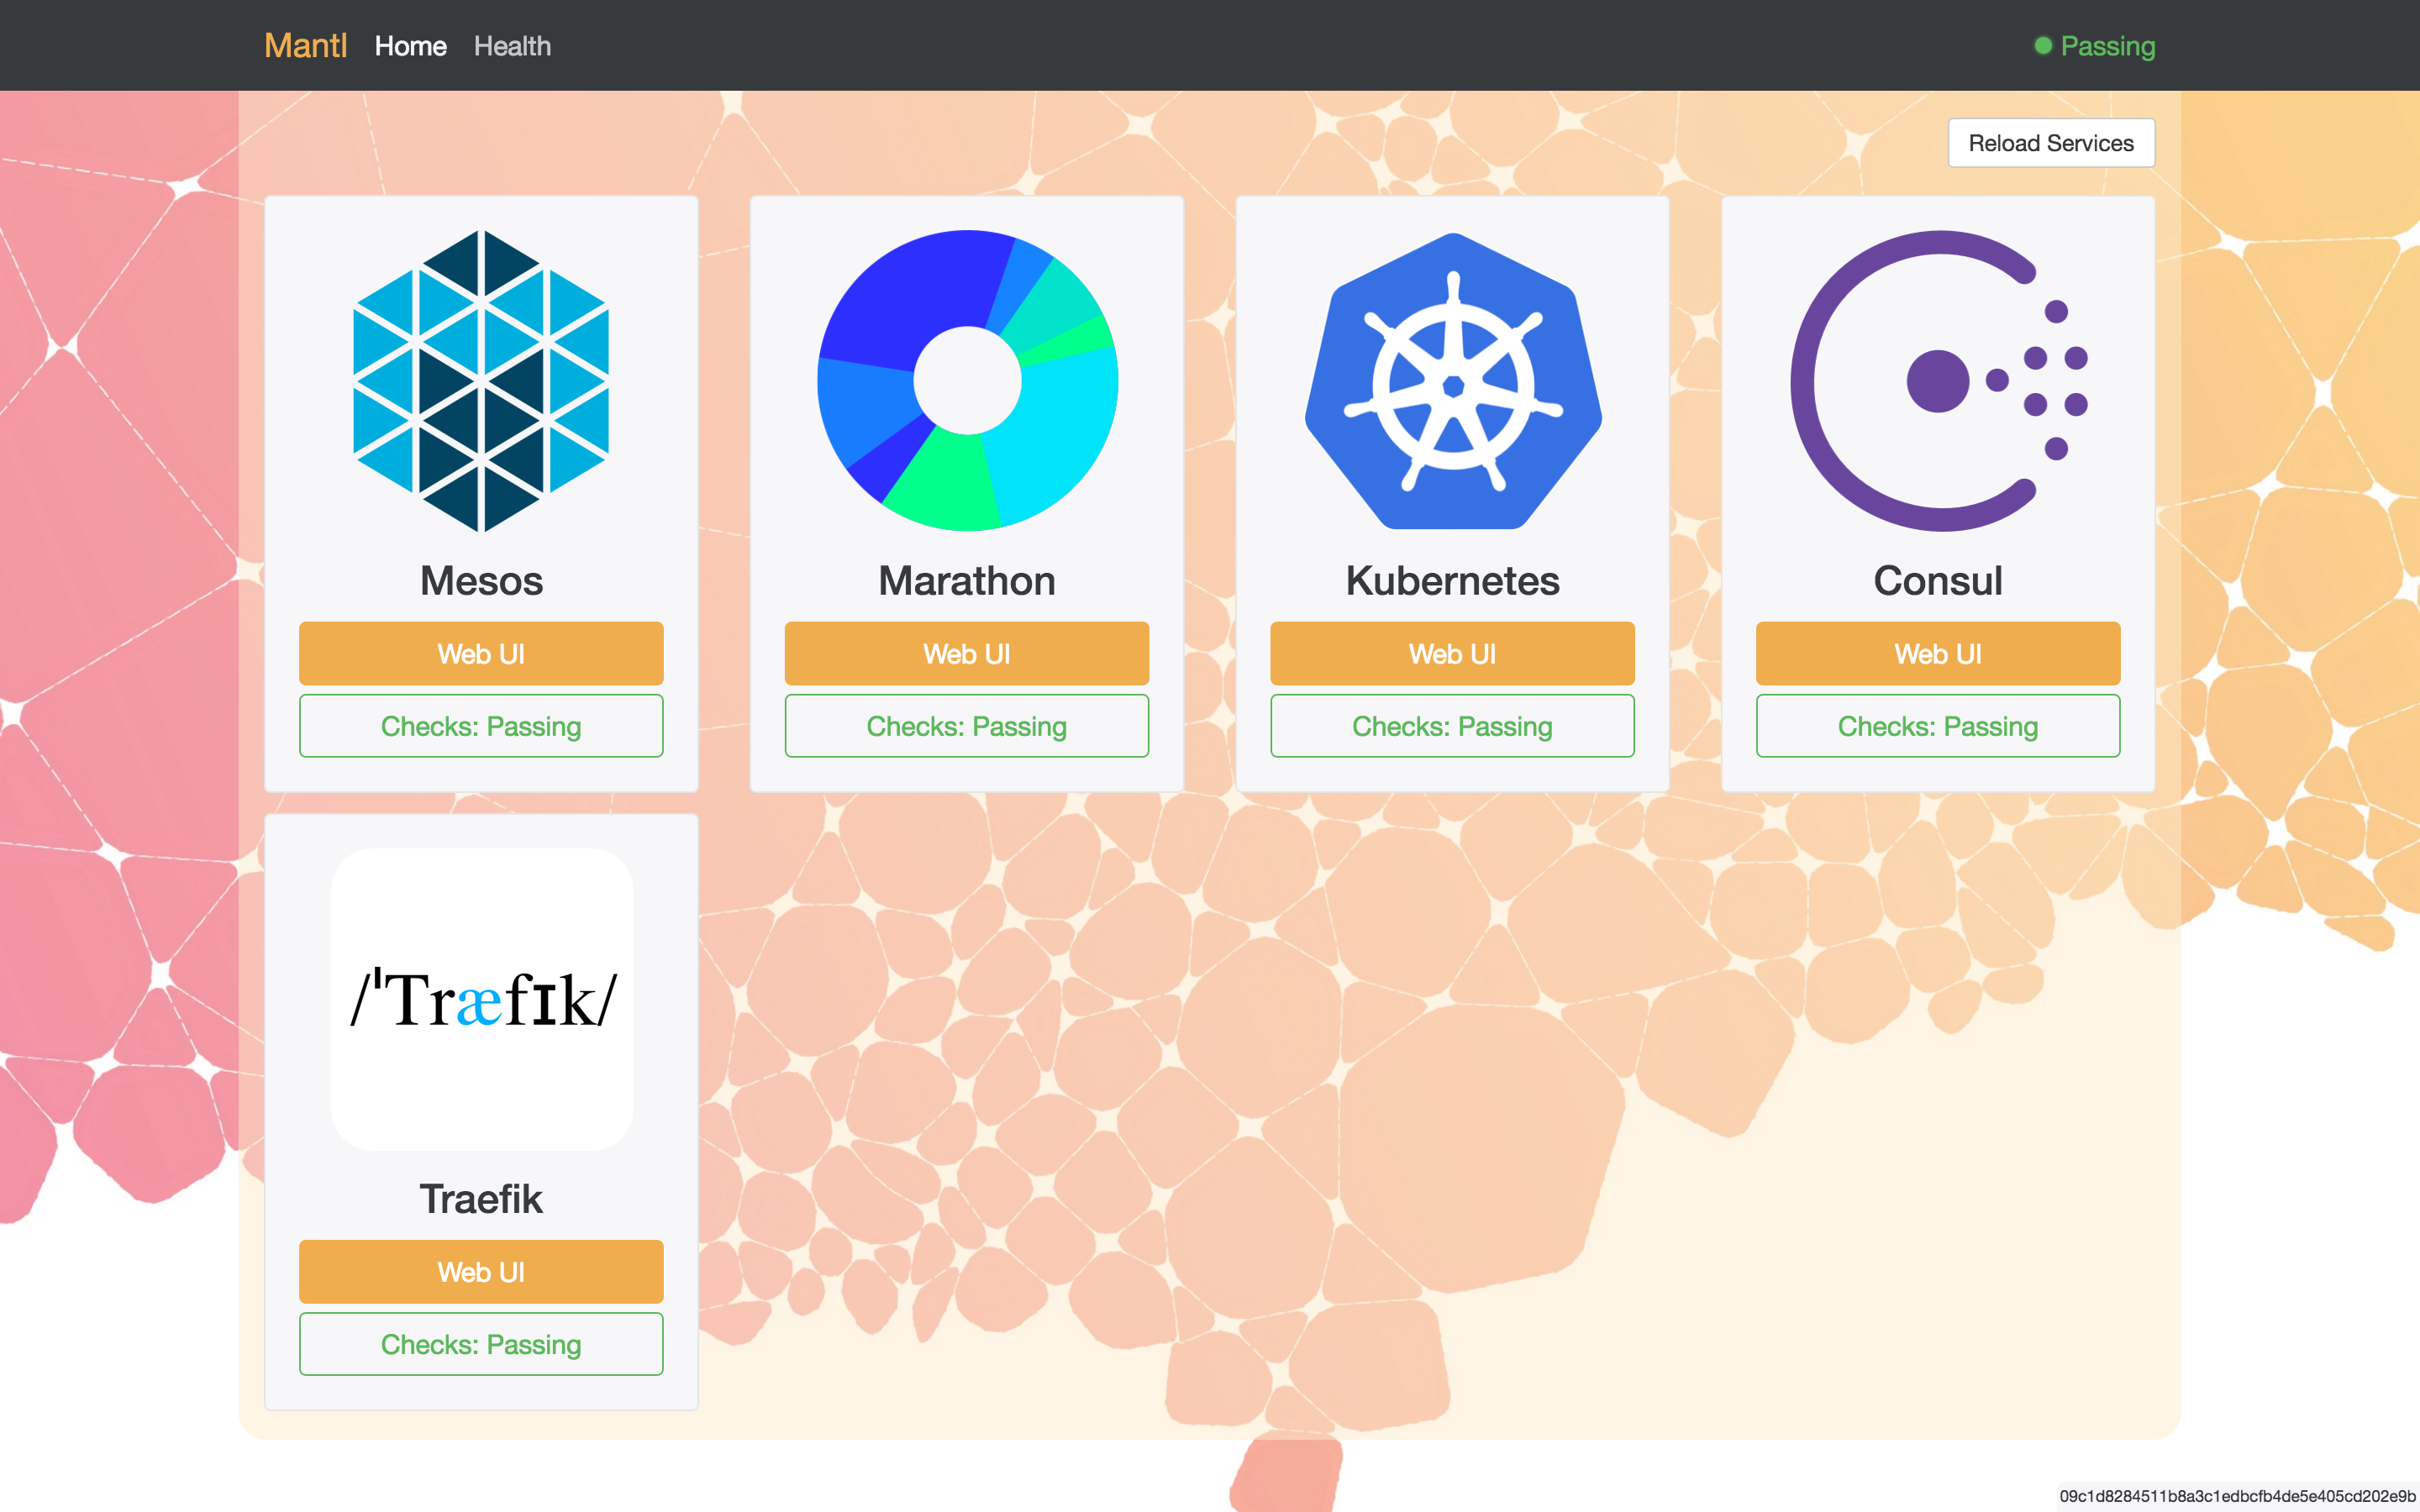
Click the image to go to the GitHub project
Customizing your deployment
Below are guides customizing your deployment:
Restarting your deployment
To restart your deployment and make sure all components are restarted and working correctly, use the playbooks/reboot-hosts.yml playbook.
ansible-playbook playbooks/reboot-hosts.yml
Using a Docker Container to Provision your Cluster
You can also provision your cluster by running a docker container. See Using the Dockerfile for more information.